
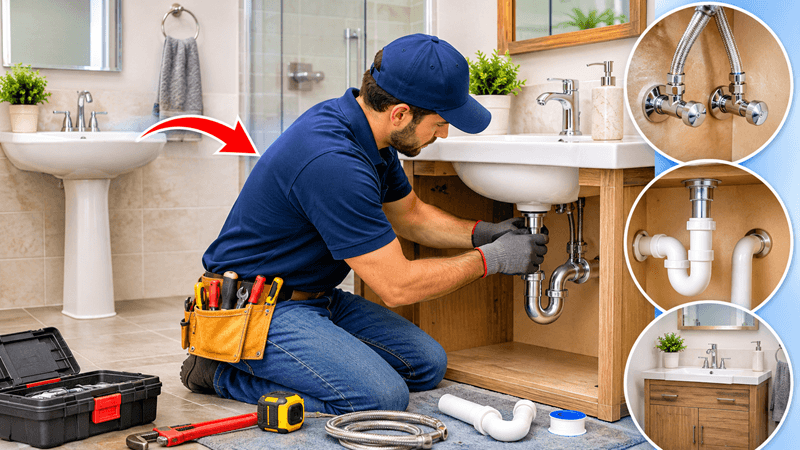
Moving a bathroom sink is a popular home improvement project, especially when renovating an outdated bathroom, changing the vanity layout, or creating more usable space. However, relocating a sink involves more than simply moving the basin and faucet. The water supply lines, drainpipe, and venting system must also be adjusted to ensure everything works safely and efficiently.
Whether you are planning a small bathroom makeover or a complete renovation, understanding the plumbing process can help you make better decisions, avoid unnecessary expenses, and achieve professional results.
Why Would You Need to Move Bathroom Sink Plumbing?
There are several reasons homeowners decide to relocate bathroom sink plumbing. One of the most common is changing the bathroom layout. For example, you might want to install a wider vanity, move the sink away from a doorway, or create additional counter space.
Other reasons include:
- Bathroom remodeling: A new layout may require moving the sink to another wall.
- Vanity replacement: Larger or differently designed cabinets may have different plumbing requirements.
- Improved functionality: Relocating the sink can make the bathroom easier to use.
- Better appearance: Moving plumbing can create a cleaner and more modern bathroom design.
- Accessibility: A different sink position may provide better access for people with mobility limitations.
Before starting, consider whether relocating the sink will genuinely improve the room. Sometimes, replacing the vanity without moving the plumbing can deliver similar results at a lower cost.
What Plumbing Components Need to Be Relocated?
Understanding the main plumbing components is essential before beginning this project.
-
Water supply lines
Bathroom sinks usually have two supply lines: one for hot water and another for cold water. These connect the wall-mounted shutoff valves to the faucet through flexible supply hoses.
When moving a sink, these connections may need to be extended or relocated. New connections should use approved plumbing materials and appropriate fittings.
-
Drainpipe
The drainpipe carries wastewater from the sink into the home’s drainage system. Moving the sink often requires adjusting the drain location and ensuring the pipe maintains the correct slope.
-
P-trap
A P-trap is the curved pipe beneath the sink. It holds a small amount of water that prevents unpleasant sewer gases from entering the bathroom.
The new sink position must allow enough room for a properly installed and accessible P-trap.
- Vent pipe
The plumbing vent allows air into the drainage system, helping wastewater flow smoothly and preventing pressure problems. Relocating a sink can affect venting requirements, so the existing configuration must be checked before making changes.
Tools and Materials You May Need
The tools depend on how far you intend to move the sink and whether the plumbing is inside a cabinet, wall, or floor.
Common tools and materials include:
- Adjustable wrench
- Pipe cutter
- Measuring tape
- Screwdrivers
- Drill and appropriate bits
- Approved water supply pipes and fittings
- Drainpipe and connectors
- P-trap assembly
- Shutoff valves
- Plumber’s tape where appropriate
- Pipe supports and brackets
- Safety glasses and protective gloves
You may also need access to wall repair materials, flooring tools, and waterproofing products if the project requires opening finished surfaces.
How to Move Bathroom Sink Plumbing Step by Step
Moving bathroom plumbing requires careful planning. The following steps explain the general process, although the exact method depends on your home’s plumbing design.
Step 1: Plan the New Sink Location
Start by deciding exactly where the new sink and vanity will sit. Measure the available space and consider the position of nearby walls, cabinets, electrical outlets, and bathroom fixtures.
Check whether the new location provides enough clearance for the sink, faucet, drain assembly, and cabinet doors.
Most importantly, inspect the existing water supply, drainage, and venting arrangements. A sink moved a short distance may require relatively minor adjustments, while moving it to another wall can involve substantial plumbing work.
Step 2: Turn Off the Water Supply
Before disconnecting any plumbing, turn off the hot and cold water supply using the appropriate shutoff valves.
Open the faucet to release remaining pressure and allow water to drain. Place a bucket and towels underneath the connections to catch residual water.
If the shutoff valves are damaged, inaccessible, or do not close completely, have them repaired before continuing.
Step 3: Disconnect the Existing Sink
Remove the flexible faucet supply lines and disconnect the drain assembly. Carefully remove the P-trap and keep a bucket underneath to collect trapped water.
If you are replacing the vanity, disconnect the sink according to its installation type. Avoid forcing connections because older pipes and fittings can become brittle.
Step 4: Access the Existing Plumbing
Depending on the new sink position, you may need to open a section of drywall or access the plumbing from beneath the floor.
Identify the hot and cold supply pipes, drainpipe, and vent arrangement before making modifications.
Never cut into a pipe simply because it appears unnecessary. Confirm its purpose first, especially in older homes where plumbing layouts may be less obvious.
Step 5: Relocate the Water Supply Lines
The hot and cold water lines must reach the new faucet location without unnecessary bends, tension, or unsupported sections.
A qualified plumber can determine whether the existing pipes should be extended, rerouted, or replaced. Connections should be made using materials and methods approved for the local plumbing system.
Install accessible shutoff valves where required. Avoid concealing joints that need future maintenance.
Step 6: Adjust the Drainpipe and Venting
The drainpipe must connect to the new sink location while maintaining the required slope and appropriate pipe sizing.
The P-trap should remain correctly positioned, and the drainage system must have suitable venting. An incorrectly installed drain or vent can cause slow drainage, gurgling noises, and sewer odors.
This is one of the most important stages of the project because drainage problems can remain hidden until the bathroom is being used regularly.
Step 7: Install the Sink and Test Everything
Once the plumbing modifications are complete, install the vanity, faucet, sink, and drain assembly.
Reconnect the water supply lines and turn the water back on gradually. Check every connection for leaks.
Run both hot and cold water, fill the basin, and release the water to test drainage. Inspect the P-trap and surrounding plumbing while the water is flowing.
Do not close the wall or finish the cabinet installation until all connections have been properly inspected.
How to Move Bathroom Sink Plumbing: Important Cost Considerations
If you are researching how to move bathroom sink plumbing, understanding the potential cost is just as important as knowing the installation process.
The final price depends on several factors, including the distance the sink is being moved, the accessibility of existing pipes, local labour rates, and whether walls or floors need modification.
A simple relocation within the same vanity area may be relatively affordable. However, moving a sink across the bathroom or to another wall can require additional drainage, venting, flooring, and wall repairs.
Your budget should account for:
- Plumbing labour and materials
- New supply and drainage connections
- Vanity and sink installation
- Drywall or flooring repairs
- Waterproofing and finishing
- Permits and inspections, where required
Request written estimates from qualified plumbers before starting. Comparing quotations can help you understand the actual scope of work rather than choosing a contractor based only on the lowest price.
Common Mistakes to Avoid
Even a well-planned bathroom renovation can encounter problems if plumbing details are overlooked.
Avoid these common mistakes:
- Ignoring local plumbing codes and permit requirements.
- Installing a drainpipe without the required slope.
- Incorrectly positioning the P-trap.
- Forgetting the importance of proper venting.
- Using incompatible pipes or fittings.
- Leaving water connections inaccessible.
- Covering plumbing before testing for leaks.
Professional inspection is particularly important when modifying drainage, venting, or concealed water supply connections.
Should You Hire a Professional Plumber?
For minor cosmetic changes, homeowners may be able to handle some preparation and removal work themselves. However, relocating water supply lines, drainage pipes, and venting systems requires plumbing knowledge.
Hiring a licensed or appropriately qualified plumber is generally the safest choice, particularly when pipes need to be moved inside walls or floors.
A professional can assess the existing system, recommend a suitable route, identify potential structural issues, and help ensure the completed installation meets local requirements.
Final Thoughts
Moving bathroom sink plumbing can transform an outdated bathroom into a more practical and attractive space. However, successful relocation requires careful planning, suitable materials, proper drainage, and reliable water connections.
Before starting, evaluate the new sink position, understand the existing plumbing layout, and calculate the complete renovation budget. Most importantly, ensure that drainage and venting requirements are addressed rather than focusing only on the visible fixtures.
With professional guidance and proper installation, relocating a bathroom sink can improve everyday convenience, support a better bathroom layout, and add value to your home.
Frequently Asked Questions (FAQs)
-
Is it difficult to move bathroom sink plumbing?
It depends on the distance and existing plumbing arrangement. Moving a sink a short distance may require minor adjustments, while relocating it to another wall can involve significant changes to water supply, drainage, and venting.
-
Can I move a bathroom sink without moving the drain?
Sometimes, depending on the sink design and existing pipe configuration. However, the drain must connect properly and comply with applicable plumbing requirements. Flexible connectors should not be used as a substitute for correctly installed drainage.
-
How far can you move a bathroom sink?
There is no universal distance limit. The practical distance depends on pipe sizing, drainage slope, venting arrangements, structural access, and local plumbing codes.
-
Does moving a bathroom sink require a permit?
Some jurisdictions require permits for plumbing alterations, especially when drainage or concealed water lines are modified. Always check local building and plumbing regulations before beginning.
-
Can I move bathroom sink plumbing myself?
You may be able to handle basic removal and preparation, but relocating supply lines, drains, and vents is best handled by a qualified plumber. Incorrect installation can lead to leaks, drainage failures, and costly repairs.
-
Is moving bathroom sink plumbing expensive?
Costs vary depending on labour, materials, accessibility, and the amount of plumbing work required. Moving a sink within the same general area is usually simpler than relocating it to a different wall or floor section.